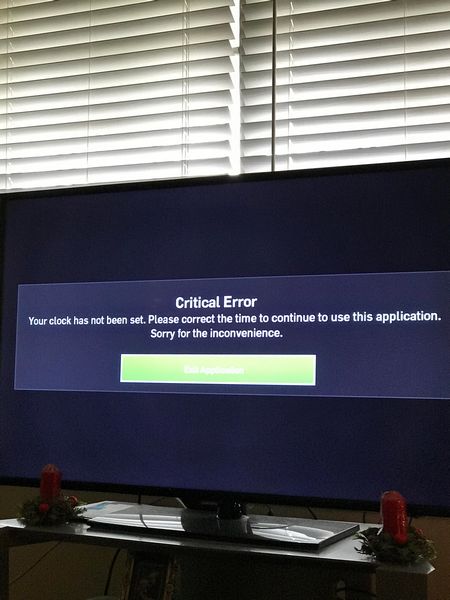
How to set the time on your Samsung TV
Samsung TV Upgrade
Samsung B-Series LED TVs do not have time zone adjustment to display the time correctly. Therefore, if you live, say, in Ukraine and use the services of a local cable TV operator, in the mode of time display “Auto” your TV will show the time that comes from your cable operator, which is usually set to display the Greenwich Mean Time Zone (GMT), the difference with Ukraine, which is 2 hours. As a result every time you flip through the TV Guide with the program schedule you have to perform in your head arithmetic operations, though not complicated, but sometimes confusing to calculate the correct time in the program. The position of Samsung TV manufacturers refusing to add another menu item for time zone adjustment (as it is done in many TV tuners) is not quite clear.
Fortunately, there is a solution for this bug, too. Once again we have to thank enthusiastic programmers who are developing SamyGO project, which has already become international.
- Samsung B-Series TV with “pre-February” (or already patched) firmware;
- an empty USB-flash drive in FAT32 format;
- From the link below you can download the new patched GMT firmware;
- in normal mode using a USB-flash drive fill this firmware into the TV;
- In the service menu of TV set the PANEURO region;
- Saving your current TV channel list to a flash drive beforehand;
- Then in the country settings you need to choose the required time zone (GMT2 or another, depending on how many hours the time in your TV differs from the real one);
- Restore previously saved TV channel list from a flash drive;
Note: after reflashing the GMT firmware and adjusting time zone all previously installed games, applications and modules (SamyGO Auto, PVR, ArFix2 etc.) will remain untouched.) will remain untouched. There is no need to reinstall anything.
The procedure is not complicated and does not take much time. There is no sense to repeat here because there is a detailed instruction which is easy to understand even for beginners (GMT firmware for your TV model is also available for download):
see. Instructions to set up the time zone in TV of Samsung B-series (to get access to the forum section you have to register there first).
For all other users whose Samsung TV models and firmware versions differ from those listed in the manual, welcome to the Russian-language forum on upgrading Samsung TV software and firmware, or for those who are good with English. then to the English forum dedicated to the project SamyGO.
P.S. Nowadays there are already new versions of patch firmware GMT2 with built-in function of quicker and easier changing of time zones. Some of them have additional functions of switching audio tracks for digital channels with one button on the remote control and changing the picture size modes during watching movies or TV shows (ArFix2). Instructions and the firmware you need can be found on the tracker (registration is required to access the tracker).
Samsung SmartTV. opportunities
Thanks to the Internet access capabilities of Samsung Smart TVs are vast and versatile. They include:
- full-fledged access to the web via the built-in browser. the user can open different websites, check the weather, news, shop, etc.д.;
- Communicate with friends and family. to the receiver you can connect a webcam or keyboard and communicate via Skype or social networks, widgets are available in the store;
- Watch movies and TV series via numerous online theaters and video services. IVI, YouTube, etc.д.;
- Voice control of the receiver and Smart TV services using the remote control;
- access to IPTV via Internet by means of special software (SS IPTV, etc.).д.);
- Downloading and playing games that can be controlled with a remote control, smartphone, gamepad, keyboard or mouse;
- support of Samsung Apps. the Samsung Smart-TV content store offers a variety of software: educational and entertaining programs, games, video services, social network widgets, etc.д.;
- Controlling the TV receiver with a smartphone;
- Play multimedia content on the big TV screen from your phone or computer;
- Broadcasting TV programs of cable or digital TV on a PC or mobile device.
These and other Samsung SmartTV features become available to the user after connecting the TV to the Internet, as well as further setup and registration of the equipment in the service.
How to set the time on your LG TV
The function of displaying the time on the TV screen is very convenient for many reasons. For example, you won’t miss when your favorite show starts on another channel. You don’t need to look for your smartphone if you don’t have it handy to find out what time it is. Always in control so you don’t stay up late watching your favorite show.
If you’re receiving a signal through the antenna, all you have to do is set the date and time to Auto, and then they’ll be set automatically, depending on the transmitting station.
Check whether the time is set correctly on the LG TV in this case, you can do as follows:
- Turn on the TV and select the “Settings” option.
- In this menu, find the “Time” item.
- Select the “Check the current time” option.
- Select “Clock” and activate the “Auto” function.
If you receive the signal through a set-top box or other external devices, you can set the date and time manually in just a few minutes.
Setting the Clock on LG TV: Instruction
- Turn on the TV and press the “Menu” button on the remote control. You will see a panel of different settings on the TV screen.
- Select “Time and date” (Clock icon). You can navigate the menu with the joystick on the remote control (Up, Down, Left, Right buttons). Confirm the action by pressing the OK button.
- Select “Clock” item in “Time & date” section. There you can set the time and the time zone.
Also pay attention to the sections “Sleep timer”, “Off time” and “Time”.”, “Time on.”. These can be used to program the TV to switch itself off after a specified period of time, or you can set the TV to switch on and off time.

It is important because on LG TV sets the time is not constantly displayed, but is shown on the screen only when you turn on or change channels. This is to avoid distracting viewers from the TV content, and to keep the TV screen from fading.

Unfortunately, date and time settings can get thrown off by external causes, such as lights out.
What to turn on, turn off and customize
Samsung: What to turn on, turn off, and configure TVs
Are getting smarter, and the setup is getting more complicated. Setting up your new TV can be a complicated process, as you manage all the features, apps and services the manufacturers offer.
To help you navigate the many menus and settings of Samsung‘s newest TVs, we delved into the features of the Samsung 65Q6FN QLED TV, which has all the latest features of 2018, including the Bixby voice assistant and enhanced real-time content. settings and Ambient mode, which lets you turn your TV into a work of art when you’re not actively watching it.And if you want to add some more interesting features to your smart set, check out the guide on how to connect your Samsung smart TV to Alexa.
Now let’s set up the screen
First of all select a signal source on the remote control.
Press Source or Input button and select a picture source: USB key (or the appropriate HDMI input if you are streaming from a PC/laptop).
Next, you must enter the TV menu by pressing the menu button on the remote control and go to picture settings. Buttons have different names from manufacturer to manufacturer: Settings, Options, Menu The picture below shows the most common remote controls.
If you have trouble entering the menu, you can find a more specific description of this procedure in the TV’s manual for your model. When you enter the menu, you will see about the following:
Next, you need to choose which way to go: to take a universal picture (faster) or adjust each parameter according to the corresponding picture (higher quality).
Setting the screen format
In order to set the format properly. you must disable the scaling functions (overscan, upscale) in the menu.
Adjusting the brightness
The correct brightness adjustment is achieved when all grayscale values are clearly visible against the black background. To do this, use the remote control to move the Brightness slider in the menu until all shades of gray are visible.
Adjusting the contrast
The correct contrast setting is similar to the brightness setting, the only difference is that now the background is not black but white. The correct setting is when you see all grayscale on a white background. To do so, use the remote control to move the Contrast menu bar until all grayscale values are visible.
Adjusting the color
The color saturation and color temperature are set according to the tint of the human skin. In order to get the right color settings, you’ll need a test picture of the women depicted on it. They have different skin colors, so you need to adjust the controls to make the skin look natural. To do it, use keys of the remote control to move the color parameter slider in the menu until all the faces look natural.
Adjusting the focus
Sharpness settings should be performed after fine-tuning the format, which is described above. For the TV screen to give a clear picture on the test picture it is necessary to achieve the most accurate display of crossings and lines. To do this, use the remote control to move the Focus slider in the menu until all crossovers are visible.
After completing these settings, exit the menu, remove the USB flash drive, turn on any movie or TV program. Then your TV is set up for a pleasant viewing experience with everything from action movies to nature documentaries.
Caption
Press “MENU” button on the remote control.
On your K-Series TV (2016), press the HOME button and select Settings on your TV screen.
On your J-series (2015) TV touchscreen remote, press the “MENU/123” button and select the “Menu” item on your TV screen.
On the F-Series (2013) touchscreen remote, press the MORE button and select “Menu” on the TV screen.
The date is set with numbers or up/down buttons
Use the numbers or the UP/DOWN buttons to set the date
Connecting the Internet on your Samsung TV
If you want to watch media content in very high resolution, up to 4K, without slowdowns and lags when watching on streaming services, we recommend you set up a network cable to access the World Wide Web on the TV. Here’s how to set up the Internet on your Samsung Smart TV via the LAN Ethernet port.
This method requires no extra action if you have DHCP mode on your PC. Otherwise you will need to:
You can get all this information from your provider. After the network settings are made, you can proceed to further explore the TV’s interface and search for channels.
Recently manufacturers try to use as few wires as possible and in the newer Samsung TVs there is no LAN port. the only option is to use wireless network. So now let’s tell you how to configure your Samsung Smart TV via Wi-Fi.
When you first turn on your TV, it will check all wireless networks in your vicinity and suggest which ones it finds. Next, you select your home network and enter the password. Usually you do not need to enter anything else thanks to the router settings.
Once you connect the Internet, the TV will find out if there is newer firmware on the Samsung website and prompt you to download it, if there is. Each new firmware version offers additional features for using the device, so it is worth to give your consent and wait until it is installed.
Next, in order to access the application store, you must register on the Samsung website. It’s simple: on the site go to the section to create a personal account, enter your e-mail and come up with a password. After registering on the site and logging in, you will have access to the app store. You will be able to run the default applications and add new ones. The app store itself is located in the APPS menu section, which is called by the Smart Hub button on the remote control.
Basic Operation, Time, Security. Samsung LE32C454E3W Operating Instructions
Time Zone: You can select your time zone.
This feature is only available when the parameter
Clock mode is set to Auto.Depending on the TV station and signal
automatic time can be set
incorrectly. In this case, set the time manually.
TV after the set time has elapsed.
different on/off settings
timer. You must first set the clock.
L Move U setting E Entry R Return
Time on. / Time off.: selecting the time (the clock,
minutes) and actions (on/off). (To
turn on the timer with the selected settings, press
Turn on.)Volume: adjust the desired volume level.Source: you can choose the content source for
TV or USB) when the automatic
If a USB device is connected to the TV.)Antenna (when Source is set to
TV): Select ATV or DTV.
Channel (when Source is set to
Contents (when for the Source parameter
USB mass storage folder with music or photo files for
playback time when auto power on
If there is no music on the USB device
A photo file, the slide show will not be shown.If the folder has too long a name, then
it will not be possible to select it. Each USB device corresponds to a
separate folder. If more than one device is connected
USB devices of the same type make sure that the names

folders corresponding to different devices
Repeat: Select Once, Everyday., Mon-Fri, Mon-Sat,