How to upload photos to instagram from your computer
How to publish a photo to instagram via computer?
Instagram was originally created for use on mobile devices. By default, with a PC you can only look at photos and comment on them. It is possible to upload photos, videos and fully maintain a profile in Instagram with the help of a PC only bypass ways. In this article, let’s understand how to publish photos to instagram via computer and what you need to do.
Maintaining social media accounts from a computer is much easier. Gathering information, writing posts, selecting and editing photos can be done directly in the browser. Switching to a mobile device afterwards, typing and uploading photos is unnecessary.
It is possible to publish a single post from a mobile device. Choose a good photo, process it with the help of the built-in editor, and then select the text and tags. The difficulties begin when:
- There are several photos;
- Photos are stored on your computer;
- You must post two or more posts a day;
- You need to add a big text to the post.
In these cases, it’s much easier to work with a PC. Saves 1 to 3 hours of time each day, depending on the complexity of the work.
Adding photos without downloading programs
Experienced users have found ways to upload photos to Instagram through a web browser without using extraneous programs. The most common way is to use the source code in the browser or the so-called “developer mode”.
Using the source code, users can open a mobile version of any website or upload photos and videos that aren’t normally available to upload. In the case of working with the site Instagram.Com user needs:
You can also use special browser extensions. There are many different plugins that make it easy to use the platform via computer.
How to upload a photo or video with the help of emulator applications
Emulator applications are able to recreate a virtual smartphone on your PC. In simple words, it’s a special program that you install on your computer and get to test any mobile app.
How it works? All program code is copied inside the emulator, so it simulates a system that is indistinguishable from the cell phone platform. At the moment, you can only emulate Android, you can not copy iOS because of the closed code, but it is not necessary in principle.
How it is convenient? With emulators you get all the features of the application you choose. In our case, it’s Instagram. You’ll be able to add and edit photos, upload stories, and host live shows.
You don’t need a cell phone for this.
What to do? Find any free emulator for Windows, Linux and macOS, download it and install it on your computer. Run the emulator and log in to Google Play through it.Then you need to connect your google account to be able to download the apps you want. It remains only to download Instagram and enter your account. That’s all, now you can upload photos, videos and use all the features of Instagram. There will be no difference in use.
You can use one of these emulators:
Working in the BlueStacks emulator
Install the emulator. 2. Also install Instagram from Play Market. 3. Click on the icon that is pictured below. In the window that appears, select the desired photo.
Next, the program will ask which app to use to launch, choose Instagram. And publish photos according to the already known scheme.
Option 4. Post a photo using delayed posting services
Popular service called SMMplanner. Allows you not only post to Instagram from your computer, but also to post similar publications on other social networks. It is convenient if the material used is the same.
Pending publication appears on the page at a specific, set time by the page owner. You can set the settings in advance, then when the deadline comes, they will appear automatically.
- Having opened SMMplanner, pass registration. The free part of the service has a certain limit on the number of publications. If you are a regular user not interested in active posting, you will be fine.
- Adding an account. After registering, you get a personal account. At the top left you can see your username, and under it are several tabs: “posts/create post” and “accounts”. To link your profile, select: “Accounts,” there among the “Instagram” icons. It will ask for username/password and permission. Once you’ve finished with the settings, click: “Connect”.
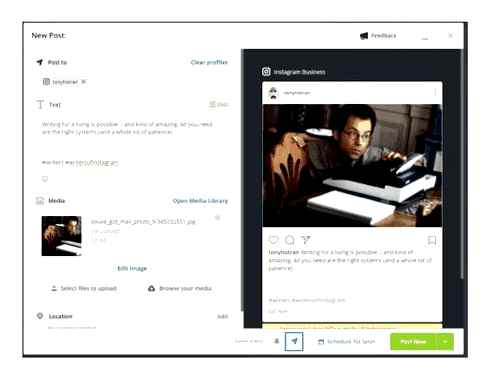
- Placing a post. Go back to your account. As you can see, your Instagram profile has already appeared there. Click on “create post.”. There is a fee to post videos, but you can post photos for free. Click on: “Schedule a new post,” a popup window will open where you can insert a photo, provide it with a caption and tags. In SMMplanner there are functions of editing: cropping, adding stickers and rotation of the image. When you’re done editing, click the checkbox to save your progress.
- Set the date and the desired time using the tabs at the bottom right. The current time is set by default. After you finish with the settings, click: “Ok”. Maximum time (forward) can be for a month.
Automatic deletion. Can be enabled in advance. Then the published post will self-delete.
How to upload photos via Yandex Browser, Mozilla, Firefox, Mac, Opera: 2 useful services
To publish a photo in your Instagram account through your computer, you do not need to download a special application for Dextop. You can post a photo through Yandex Browser, Mozilla, Firefox, Max, Opera, using services for autoposting:
- Parasitelab. Popular online service for autoposting, through which you can schedule publications of various social networks. Very easy to use. You can use it for a week absolutely free, after that you need to buy a paid plan.
- Smmplanner. One of the best online services for auto-posting. Through SMMPlanner you can publish not only posts but also stories. The main advantage of using the service is that you can make as much as one hundred publications per month absolutely free.
How to Upload a Photo from Your PC to Instagram
Scheduling and publishing photos with the SMMPlanner service
Downloading content without programs via HTML code
There is another way to publish photos. Using HTML code. Act as follows:
Go to the official instagram site.Com via any convenient browser;
Using the key combination CTRLSHIFTI (or CTRL SHIFT C) go to the developer panel (alternatively, right-click on the page and select “View item code”);
In the upper right corner, open the cell phone emulator through the “Toogle Device Toolbar” icon (the icon with the image of a smartphone and tablet);

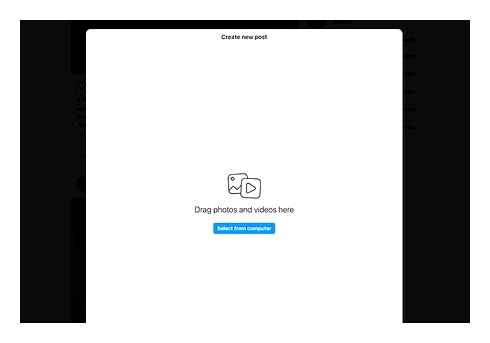
Immediately after the site update you will find that you have the same functionality available in the mobile version. After these steps, you will have a button at the bottom of the page with the image “”, by clicking on it, you can select photos from your computer and add them to your page.
Uploading photos from your computer via mobile emulator
There are five ways to post photos to Instagram from your computer:

-
. The fastest of all, but not very convenient Same as developer mode, only more convenient. Requires installation The most time consuming option. But all the functions of the social network are available through it. It is an exact copy of the application on the phone It is convenient, but there are nuances To post photos and videos from your computer, only Gramblr is able to do it. The program is handy, but it must first be downloaded, then unzipped and registered.
The fastest way to add a photo to Instagram from your computer is to upload it via developer mode. But it is not very convenient. The extension is better in this regard. But both the developer mode and the extension are only suitable for publishing posts. Other functions of a social network do not work in them (for example, Direct). The only way where everything is available and everything works is the Android emulator. But it is the most time consuming.
How to upload photos videos on instagram from a computer 2022 (NEW UPDATE)
P.S. And it’s also possible to upload photos directly: connect your phone to PC with USB cable, upload needed photos in DCIM folder and post them to Instagram via phone app (as usual).
How to add a photo to Instagram from your computer using the official mobile app
Another guaranteed and working today way to post photos or videos to Instagram with only a computer is to use the official Android app running on the computer.
You’ll need third-party software. An Android emulator for Windows or another OS. To run the Android Instagram app on your computer. A list of free emulators and official sites where you can download them, you can find in the review: Best Android emulators for Windows (opens in a new tab).
Of those emulators that I can recommend for the purpose of posting to Instagram. Nox App Player and Bluestacks 2 (but other emulators will be no more difficult task). The following is an example of downloading a photo using Nox App Player.
- Download and install the Nox App Player on your computer. Official website: https://ru.Bignox.Com/
- After launching the emulator, either go to Play Market inside the emulator, or download the APK of the Instagram app into the emulator (the original APK is easiest to download from apkpure.Com, and to download and install in the emulator use the special button in the panel next to the emulator window).
- After installing the application, simply launch it and log in to your account.
- Publish a photo in the same way as from an Android phone or tablet: you can take a photo from your computer’s webcam, or you can select “Gallery”. “Others” to select the photo to upload to Instagram in the “internal memory” of the emulator. But don’t hurry to do it yet, first. Point 5 (as there is no photo in internal memory yet).
- In order to get the desired photo from your computer in this internal memory or in the gallery, first copy it to the folder C:\Users\Username\Nox_share\Image (Nox_share is a shared folder for your computer and the Android running in the emulator). One more way: in emulator settings (a gear in the top line of the window) in item “Main” enable Root-access and restart the emulator, after that files of images, videos and other files will be possible simply to drag and drop on the emulator window.
- Once you have the photos you want in the emulator, you can easily publish them from the Instagram app. In my experiments, adding photos from Nox App Player did not have any problems (but Leapdroid gave errors when working, although the publication did take place).
In the BlueStacks 2 emulator (official website: https://www.Bluestacks.Com/en/index.Html ) uploading photos and videos from your computer to Instagram is even easier: just like in the method just described, you will first need to install the application itself, and then the steps are as follows:

- Click on the “Open” icon in the panel on the left and specify the path to the photo or video on your computer.
- Bluestacks will ask which app you want to open this file with, select Instagram.
Well, I’m sure you know what to do and how to do it, and publishing a photo will not cause you any difficulties.
Note: BlueStacks is the second thing I look at, and not in as much detail, because I don’t really like the fact that this emulator does not allow you to use itself without entering your Google account information. In Nox App Player, you can work without it.