How to change the audio track on your Samsung TV
Remodeling Samsung TVs
Without going into detail, we can only say that DTS (Digital Theater System). Is an audio codec, or, in other words, a sound format with a lower degree of compression (which means, theoretically, a higher quality of sound) than the competing AC-3 (Dolby Digital). Despite the fact that both of these formats were presented at almost the same time, with the development of technology “home theater” in the web began to appear more and more movies in high definition quality, where the soundtracks are encoded in DTS. However, Samsung’s built-in media player does not support this audio format (at least not on B-Series TVs). Therefore, watching HD movies (usually movies with MKV extension) in Samsung TV media player becomes simply impossible. The picture below shows the contents of such a MKV file, showing that both audio tracks are DTS encoded (open the image in a new tab to view it in larger scale):
Trying to watch such an MKV movie on a Samsung B-series TV media player, you will at best get a single picture with no sound, or. A message appears on the black screen of your TV saying that the video format is not supported. What to do in this case?
An alternative solution to the problem is to pre-encode the movie on your computer into a different format that your TV “understands”, using a converter of some sort (e.G, Xilisoft Video Converter Or its program counterpart ImTOO Video Converter). But this procedure takes some time, even on a powerful processor, not to mention the fact that it is not very convenient, given the large size of the film of several gigabytes. Fortunately, with the appearance of another module-application SamyGO DCA for Samsung TV sets the problem of codecs previously not supported by TV media player is solved in no time.
Note: If you have a TV with CI interface, t.Е. There is a combination of letters CIP in the firmware name (for example T-CHUCIPDEUC) the sequence of actions will be slightly different and instead of the “Game” section of the library you will need to use the “CHILDREN” section to install DCA-module into TV memory. Full installation instruction of DCA module for Samsung TV sets with CI interface is available in INSTALL, which is included in the archive with the application. Open the file INSTALL Notepad is the easiest way to open the file.

- Unpack our archive with the application;
- Copy only the folder to the flash drive samygodca, which is located in the folder release (for CI you will need to copy the whole folder release as a whole);
- Insert flash drive into USB port on TV and through the library Content Library In the usual way (as we have previously installed SamyGO Auto) we fill in the internal memory of the TV in the section THE GAME our new module DCA (for CI you must use the “CHILDREN” section). The result of this simple manipulation is shown in the picture below:
Note: This version of the module, unlike SamyGO Auto, PVR and other applications, has not yet implemented a mechanism for starting it automatically when the TV turns on. So every time you encounter a problem with playing a movie in the TV media player (movie won’t play or has no sound), the DCA module will need to be launched manually.
- You try to play the movie (for instance, in MKV format) in the TV media player but it plays without sound or says this format is unsupported.
- Turn off the TV (red button POWER on the remote control), then turn it on again.
- Go to the library section The game And start the DCA module there.
- And only after that you go to the media-player and open our movie which should play without problems.
Also, after starting DCA-module, PVR channel recording function may be unavailable until the next power on the TV.
Finally, it is very likely that for each subsequent film containing soundtrack in DTS format, you will need to restart the DCA-module (ie, two films in a row with sound in DTS format watch without restarting the DCA-module is unlikely).
How to translate your TV into Russian?
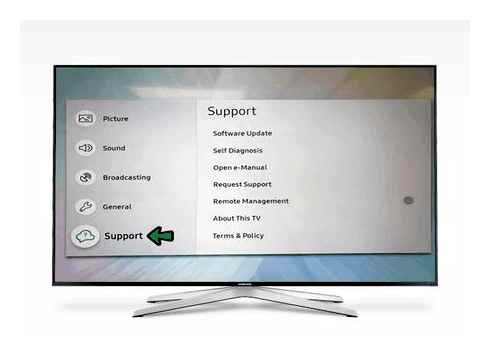
To get to the TV settings, you have to press the Settings button on the remote control (Gear icon). Next, go to the Language section and find your native language. This procedure should be followed if the menu was not russified when the TV was turned on for the first time.
Put the TV in standby mode, turn off the TV with remote control, then successively press the buttons on the remote control: “Info, Menu, Mute, Power”, then the TV turns on and displays the service menu.
Sound Check 5.1 on how to connect the speaker to the Samsung Smart TV and not only
Greetings, dear readers of the blog! Let me start this article by saying thank you. Indeed, despite the fact that the recent site is not very stable, you still come here, because attendance is not falling.
I think that very soon all the technical problems will be solved and the resource will begin to “function” quickly and accurately. After all, judging by the instant responsiveness of the new hosting support, the author this time was not mistaken.
And now let’s get to the topic of the article. And today it’s going to go like this: sound check 5.1 when you connect speakers or a home theater to your Samsung Smart TV, as well as any other media devices:
If you remember, we have already repeatedly talked about multichannel sound in smart TVs. But judging by the Комментарии и мнения владельцев of users, many are still unable to understand even after connecting if everything works correctly.
So it turns out that a person is at a loss guessing what kind of sound is coming from the speakers: surround, or the usual two-channel stereo. So now we are going to break this case to be sure of everything.
Articles:
But before you check the sound 5.1, you need to properly connect the speaker system with Dolby Digital support to the TV set. This entire process is very detailed in the article about watching movies 5.1 online.
If you have not read it, be sure to read it to understand the basics and the essence of the question. But in case you don’t have a Samsung Smart TV in your music circuit and you just need to check 5.1 on the other hardware, skip it.
So, let’s assume that at this step you have everything properly connected and configured. Let’s proceed directly to the performance test. How to do it?. You ask. Yes very simple, see for yourself:
To do it, we need just a small special file which can be downloaded from here. Then you need to copy it to a flash drive and run it on your playback device.
In the case of Smart TV (our profile), you can even do without a flash drive, with a media server. That is, you can download the file to your computer and start watching it from there. You should agree that it is very convenient.
Further course of events, using the “smart” TV Samsung E-series in 2012. Open our test file on TV. Now you will see and hear in what order the scheme shown in the video plays 5.1:
This is the sequence in which yours should play. That is the sound in the video and in reality should be identical. The front speakers will play first, and then the rear and subwoofer.
By the end of the “movie”, a real artillery cannonade will break out in your house. A few seconds will sound all the speakers and you will understand what is the real sound around:
Thanks to this check 5.1. You can see at once if the speaker system is properly connected to the head unit (receiver, subwoofer), if the correct sequence is observed and so on.
By the way, for Samsung Smart TVs, be sure to go through “Menu-Sound-Additional Settings-SPDIF Output” at the beginning of playback:
And make sure that you have “Dolby Digital” selected here, because the default setting may be “PCM”, which is only two-channel stereo sound:
Well, at this step we can say that the sound check is 5.1 successfully completed. Your home theater is now completely ready to use. So, hang in there poor neighbors.
In general, I advised you how and what to set up, but the most such a system is temporarily gathering dust on the shelf in inactive. That’s such a depressing picture:
And all this because my little son (one year and two months) has already started to reach the TV screen and quite strongly press it. So, in order not to get to the beat pixels, I had to remove the subwoofer to push the TV further.
But while I was rejoicing at my witty solution, he managed to reach the speaker, which was hanging on the wall, and here is the result:
Let me tell you, the sound check is 5.1 at this stage of my son’s age, so far I’m only dreaming. Well, don’t get lost, set up everything according to the article and go ahead. If you have any problems, welcome to the Комментарии и мнения владельцев! That’s all for now!
How to change the Audio Track In SHARP AQUOS Television
How to add a new sound track to your video?
Open the Video Manager and click on the arrow next to the Edit button on the movie you want to edit. Click the Sound button in the menu. Click on the Add or Replace Soundtrack tab below the player. Click Add to video to select a track, then watch the video with the selected music.
Usually on LG TVs/monitors you press “Q” on the remote control. Menu/Set video playback options/Audio language, use left/right buttons to select the first or second track.
Retrofitting Samsung TVs
Once upon a time with the advent of DVD players, one of the revolutionary innovations was the ability to switch audio tracks while watching movies. You could watch movies with Russian dubbing or include the original (eg, English) track. Maybe for most viewers this feature seems useless, but for linguistics students. It’s a great opportunity to improve their English language skills. Anyway, most video files on Russian-language torrents and video portals come with two (Russian and original English) tracks. And most media players have the audio stream switching feature:
Nevertheless, the original Samsung TV media player does not support this function. As always, Samsung had to solve this problem for enthusiastic programmers. Here’s how to make it possible to switch audio streams while watching movies on your local network or from a portable hard drive/flash drive in your TV’s media player.
Note: let’s assume that we already have a video file with two audio tracks, but you can always (or almost always) find the audio track with the language you want for the movie you are interested in on the Internet and add it to the existing video container of the movie file (for example, using the free VirtualDubMod program or similar programs).
- Download updated version of SamygoPVR-0 program.10.2 (today there is already a more advanced PVR 3 channel recording application).X, but for now we will not consider its installation and operation, at least until the developers do not solve the problem with saving channels to the computer, where as the NFS-server is used haneWIN);
- After you have downloaded the program archive, unzip it and go into the folder SamyGO PVR, where the folder src with source code can be deleted at once (you won’t need it), but the file we are already familiar with from the previous section pvr.Ini open them for editing;
Note: edit the file pvr.Ini I recommend you use Notepad, not the usual Windows Notepad, but the more versatile Notepad.
Note: sometimes when watching a movie in the TV media player the audio tracks are not switched immediately. When you click on the red square button, the sound disappears at first, and you have to press the button again to switch on the second track. It is not always possible to return to the previous track. You have to stop and restart the movie (luckily, there’s a blue button that lets you pick up where you left off).
The following section will address the problem of DTS audio format, because of which in some films (most often in matryoshki with MKV extension) does not work the function of switching soundtracks, not to mention the fact that such films can not play in the media player TV at all or play, but without sound.
How to auto tune a Samsung TV
How to configure your Samsung TV
Improvements made by Samsung in modern televisions have not only affected the matrix, screen diagonal and other parameters. At the same time as the technical characteristics are updated and the sets of features. Thanks to them, control becomes better, and settings. Easy and fast, accessible even to novice users.
Nevertheless, all the new models that join the line of products, have their own specific features, including in the field of settings. After all, they will depend on all the work of the TV. Some innovations can cause difficulties, especially the updated interface, which is used to do all the Samsung TV setup.

This is largely due to the fact that, starting from the 6-th series, devices with LED matrix are equipped with preinstalled Smart TV. Those who encounter smart electronics for the first time can not and do not want to go into the intricacies of the settings, preferring to pay quite a lot of money engaged specialists. This, of course, is a personal matter, but it is worth remembering about the Russified operating system, which allows you to easily perform all the manipulations yourself. You just need to follow the advice and tips, which appear on the screen, step by step.
Nowadays, not everyone uses paper instructions, because the most simple interface easily solves the question of how to configure the Samsung TV. In the menu there are no incomprehensible commands with complicated or ambiguous interpretation. After turning on the device, all actions are performed using the remote control. Tuning free channels is possible with the simplest antenna.
All the innovations released by the company mainly affect the additional features that can wait. You can do it later when all the basic settings are done.
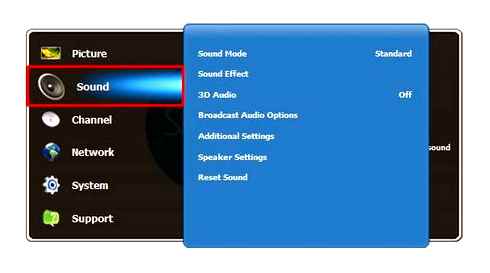
Audio Control, Sound Menu Setting. Samsung TV Operating Instructions
You can select a sound mode according to your preference.
TOOLS to display the Tools menu. You can also execute
Standard Select Normal Sound Mode.Music amplification compared to the sound of the voice.Movieto get the best sound quality when watching movies.Clear voiceEnhance of the voice compared to other sounds.Use.Restoring the user audio settings.
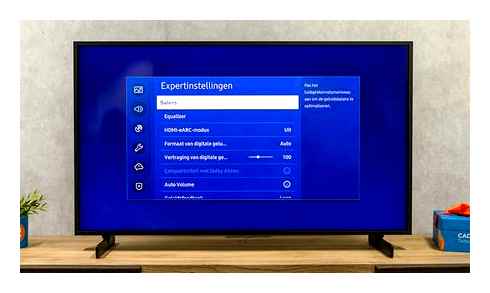
You can customize the sound settings according to your preferences.Modeyou can select a sound mode to suit your preferences.Balance Adjust the balance between the right and left-hand speakers.100hz / 300Hz / 1kHz / 3kHz / 10kHz (bandwidth adjustment)Controls the sound level in various frequency bands.Resetreset equalizer settings to defaults.

SRS TruSurround HD is a patented SRS technology that reproduces multi-channel audio
(5.1) Television through two loudspeakers. Trusurround feature provides breathtaking playback
Virtual surround sound through a dual-speaker system, including built-in speakers
TV. Function works with all multi-channel formats.
SRS on the remote control and select Off. Or On/Off
Audio language (digital channels only)
You can change the default audio language. Displaying information about the language of the incoming stream.
You can only select a language among the languages in which programs are broadcast.
Audio Format → MPEG / Dolby Digital (digital channels only)
When audio is output through the main speaker and audio receiver, an echo effect may occur due to differences in speed
Decoding these devices. In this case, use the TV speaker function.
The audio format will appear according to the broadcast signal.
Audio description (digital channels only)
This is an auxiliary audio function that provides an additional audio track for people with impaired
Vision. This function processes the audio stream for AD (audio description) when it is sent by the broadcaster
Along with the main audio. Users can turn the audio description on or off and adjust the volume.